The Five Most Common Aluminum Sunroom Problems—Fixed at the Design Stage
Most sunroom complaints aren’t installation errors. They’re design errors built into the aluminum profiles before they ever reach the site. Sagging beams, water on the floor, fogged-up frames, cracked glass—these have root causes you can trace straight back to an extrusion die.
Here’s what goes wrong, why, and how to stop it from happening on your next project.
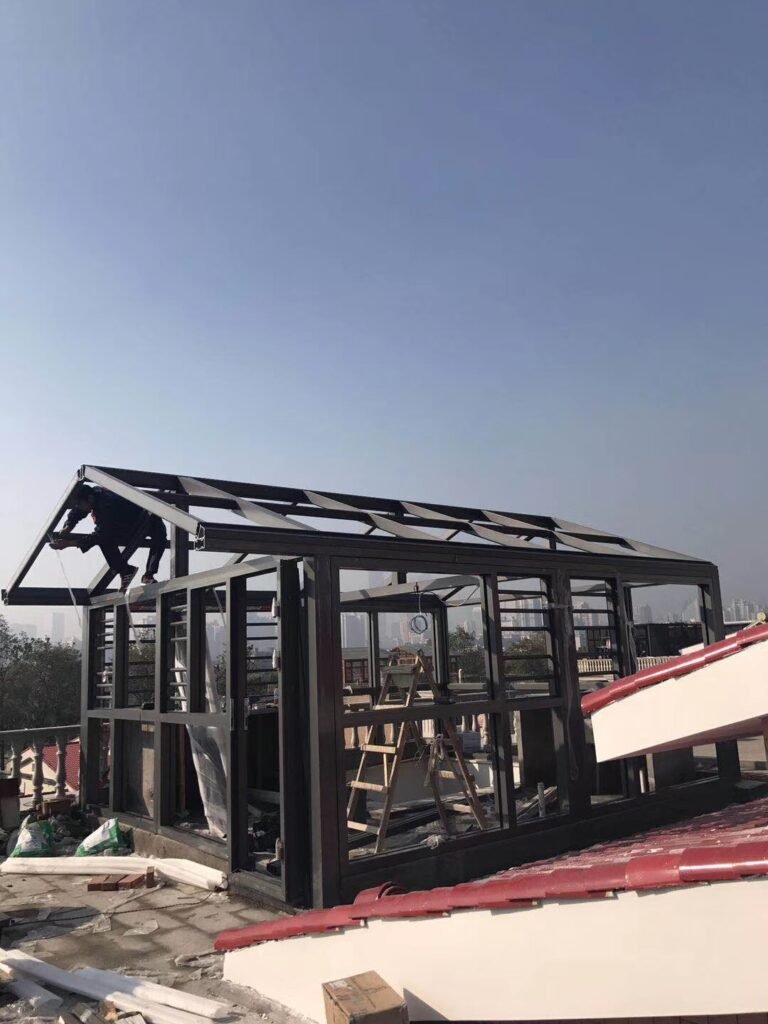
Problem 1: Beams and Rafters That Deflect Under Load
What the owner sees: After the first heavy snow, the ridge beam has a visible sag. The roof feels bouncy in high wind.
What’s actually happening: The profile’s section modulus is too low for the span and load. Many sunroom kits use the same 6063-T5 thin-wall sections you’d put in a window frame. That’s fine for a 2-meter vertical mullion. It’s not fine for a 4-meter beam carrying 35 kg/m² of double-glazed glass plus 100 kg/m² of wet snow.
The fix starts in the die:
- Move to a stronger alloy. For spans over 2.5 meters or anywhere with real snow load, 6063-T6 gives you about 30% more yield strength. For spans over 4 meters, use 6061-T6—it nearly doubles the strength of T5 and takes welding well.
- Don’t just add wall thickness everywhere. Add it where the bending stress is highest. An internal stiffening rib placed correctly can raise the moment of inertia by over 30% without making the whole profile heavier.
- Check the numbers before cutting steel. We pre-check section modulus and predicted deflection against the actual span and local load code. If it’s going to deflect past L/250, you know before the die is made.
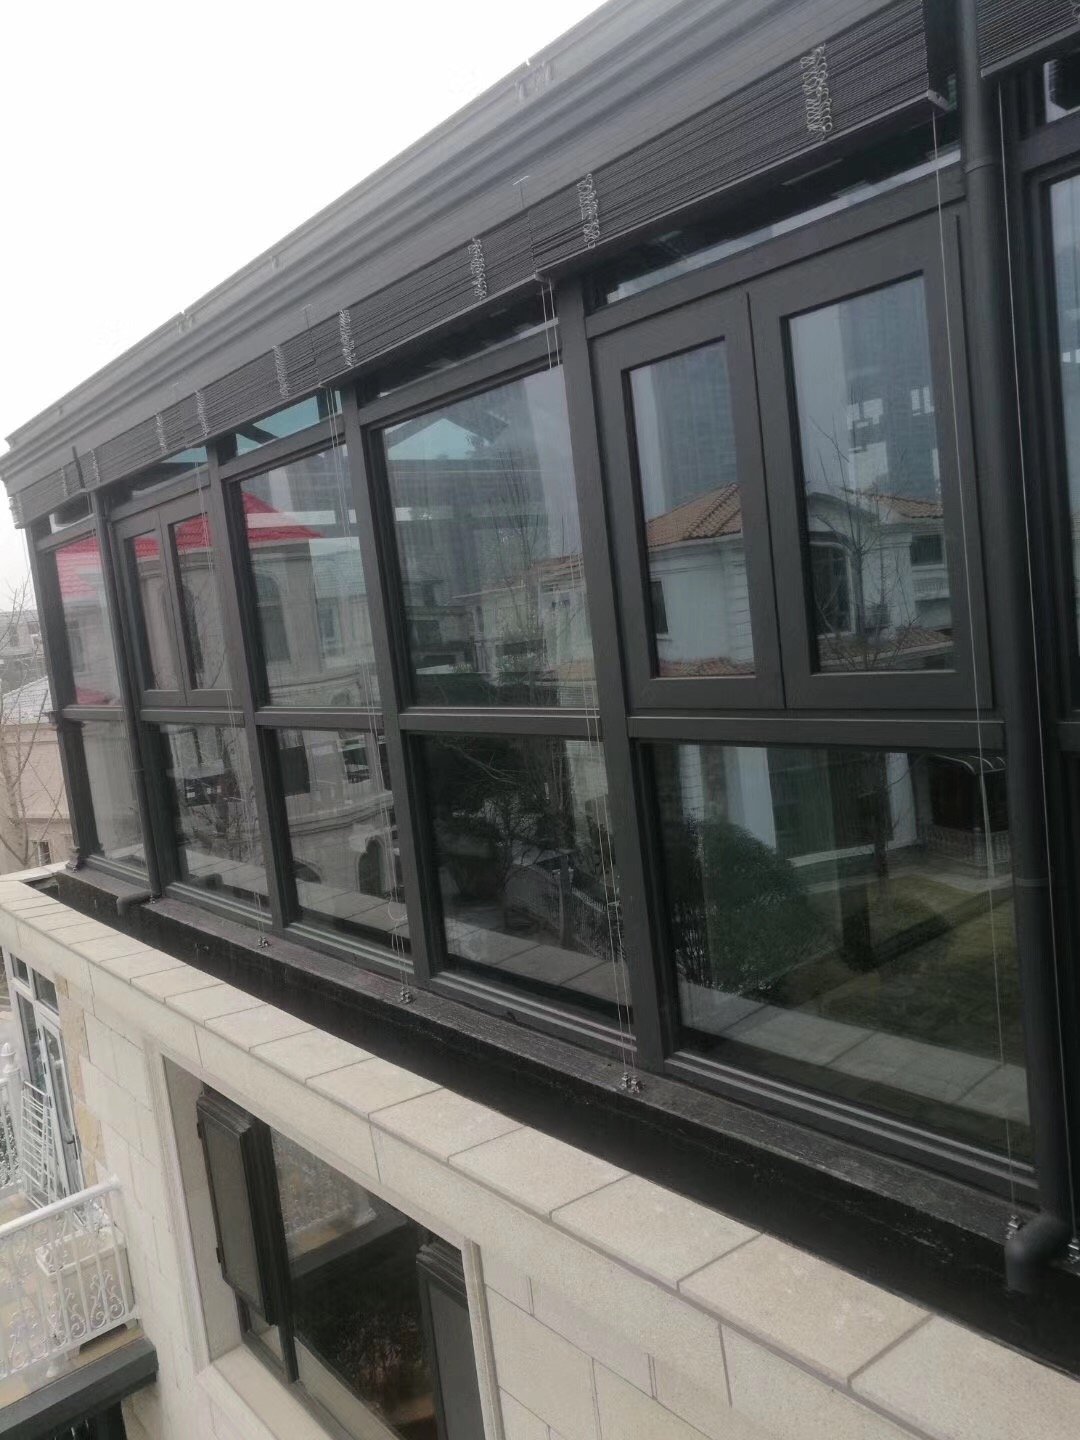
Problem 2: Thermal Breaks That Stop Breaking—Then Start Again
What the owner sees: Water dripping off the inside of the frame all winter. In summer, the aluminum is hot to the touch. After a couple of years, the plastic strip between inner and outer profiles has loosened or pulled out completely.
What’s actually happening: A thermal break is only as good as the mechanical bond between the nylon strip and the aluminum. Cheap strips (PVC, low-glass nylon) expand and contract at different rates than aluminum. Poor rolling—smooth groove walls, light pressure—gives you a weak friction fit instead of a true mechanical lock. The strip walks out over time.
The fix:
- Specify PA66 with 25% glass fiber (GF25). It’s the industry standard for a reason—thermal expansion close to aluminum’s, high tensile strength, and it doesn’t creep under sustained load.
- Knurl the groove before rolling. The aluminum groove walls get a sharp, serrated tooth profile. When the strip is pressed in under high pressure, those teeth bite permanently into the nylon. This is a mechanical interlock, not just friction.
- Shear test every batch. The bond should hold at least 24 N/mm in longitudinal shear. We test it.
Problem 3: Water Where It Shouldn’t Be
What the owner sees: Puddles in the corners, water staining along beam-to-column joints, drips coming through even after re-sealing.
What’s actually happening: Sealant is being treated as the primary water barrier—and it fails. A properly designed aluminum profile doesn’t rely on sealant alone. It gives water that gets past the glass edge a defined drainage path: a secondary channel, a slope, an exit hole. Without that, water sits in cavities, finds the lowest joint, and leaks inside. The other culprit: a gutter that’s flat-bottomed or too shallow, so water backs up and overflows at joints.
The fix:
- Extrude drainage channels directly into the rafter and beam. A secondary drip groove under the glazing pocket catches any water that sneaks past the outer seal and channels it toward the gutter or down a column cavity.
- Build the gutter right. The gutter profile should have a molded longitudinal slope (at least 1:100), a drip nose, and an overflow weir. If leaves block the main outlet, water rises to the overflow notch and drains outside—not inside.
- Pre-drill drainage outlets at the factory. No guessing on site. We drill the holes to your downpipe layout so water has an unobstructed path from day one.
Problem 4: Cracked Glass and Torn Seals from Thermal Movement
What the owner sees: A loud crack on a hot afternoon—one of the glass panels has shattered. Or, after a few years, the structural sealant pulls away from the aluminum, and water seeps in.
What’s actually happening: Aluminum expands and contracts about 2.5 times more than glass with temperature change. On a 6-meter beam with a 40°C swing between winter night and summer sun, the aluminum grows 5.5 mm. The glass moves maybe 2 mm. If the glazing pocket is too tight, the aluminum pushes and pulls on the glass edge every day. Eventually, the glass cracks or the sealant tears.
The fix:
- Design the glazing pocket with enough depth and clearance. The glass edge needs a minimum bite (typically 15 mm) but also a gap (5–8 mm) all around, filled with resilient setting blocks and flexible weather seal. The glass is held, but it can move slightly relative to the frame.
- Put expansion joints in the frame for long runs. Any continuous frame over 6 meters should have a designed break—a slip joint with a flexible cover—to absorb the overall length change.
- Use nylon-washered bolts at beam-to-column connections. A little rotational give at the joint relieves thermal stress without weakening the structure.
Problem 5: Frames That Fade, Chalk, or Corrode
What the owner sees: South-facing frames are several shades lighter than the rest after 3–5 years. On coastal jobs, white powder blooms on the surface or coating blisters peel off.
What’s actually happening: The wrong finish was specified for the environment. Standard interior-grade powder coating or thin anodizing won’t survive year-round UV and salt. The roof takes the worst beating—direct sun, standing water, and salt-laden wind at a bad angle.
The fix:
- Match the finish to the location. For inland, a super-durable polyester powder at 60–80 µm works for 15+ years. For coastal or industrial zones, PVDF fluorocarbon (3-coat, ≥35 µm) is non-negotiable. The carbon-fluorine bond shrugs off UV and salt spray in a way powder can’t match.
- Treat the roof more aggressively than the walls. It’s cost-smart to specify PVDF or extra-thick powder on roof profiles while using standard powder on verticals. We can split the finish within one order.
- If you anodize, go thick and seal it right. Outdoor sunrooms need AA15 or AA20 film with high-quality nickel salt sealing. Thin anodizing and cold sealing won’t hold up.
- Package like you mean it. Every profile wrapped individually, with foam spacers between pieces. A scratched coating at installation becomes a corrosion site for life.
The Point
None of these fixes are expensive design changes. They’re mostly decisions made at the die design stage, the alloy spec, the finish order. Once the right profiles arrive on site, the installer’s job gets simpler: fewer callbacks, fewer angry owners, fewer silicone repairs in the rain.
If you’re specifying a sunroom system—or building your own—ask your profile supplier what alloy they’re putting in the beams, whether they knurl the thermal break groove, and how the gutter drains. If they can’t answer those three questions clearly, you’ll be answering to your client later.
We pre-check beam deflection, knurl every thermal break profile, integrate drainage into the extrusion, and match the finish to the site’s actual environment. Send us your sunroom drawings. We’ll go through them with you.